Table of Contents
The meat thermometer is one of the most critical kitchen equipment that is sometimes ignored. Many individuals believe that depending on a certain length of suggested time to roast meat is acceptable, particularly if they’ve followed the same recipe for times. Others perform a colour test by cutting across a piece of meat to determine if it is still pinkish.
However, these procedures aren’t perfect, and you might end up with undiscovered uncooked meat that may make you sick. Using the best meat thermometer is the only method to ensure that meat like beef, chicken, and pig is completely roasted and safe to consume.
Adding an elevated steak thermometer to your cooking arsenal is a simple and quick method to improve your culinary skills. Bid farewell to chicken that you thought was perfectly cooked and red beef that you swore was medium-rare.
But, you would like to be sure you’re operating the best meat thermometer for the grill correctly to achieve the best results. Fortunately, they’re simple to operate—just follow these instructions to make certain you’re utilizing your thermometer correctly.
It occurs to all: you end up spending many hours roasting a pricey piece of meat (or agonizing seconds grilling a fine steak), just to undercook or overcook it. That’s why mastering the operation of a meat thermometer may become a life-altering, economical, and stress-relieving epiphany. Plus, despite the fact that it appears to be a complicated process, it isn’t!
Meat thermometers come in a variety of styles. They may also be costly, with elevated versions costing upwards of $100. So, which steak thermometer is the best for ensuring food safety? We have done the research and put up a rundown of important features, highest efficiency, and value that will last you for a long time.
Decide the Type of Thermometer You Require
Meat thermometers come in a variety of shapes and sizes. The bimetallic and bulb thermometers, the two very basic types, may be found in usual supermarket shops. These are low-cost and incredibly accessible choices, but they can consume a long time to produce a temperature reading and aren’t as precise as other choices. Furthermore, its glass components are prone to breakage.
Electronic instant-read thermometers are the Kitchen’s pick for meat thermometers since they give significantly more appropriate results. In this category, there are two primary types:
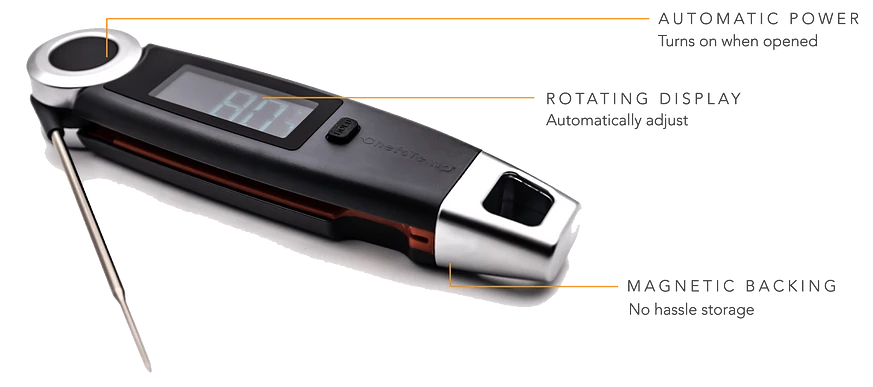
●A digitized instant-read thermometer provides an (almost) instantaneous reading and is simple to utilize. We recommend ChefsTemp or its more expensive versions for a speedier read-out.
● The best digital meat thermometer, that links a probe inserted into the flesh to a different channel with a temperature reading and adjustable alert settings, is ideal for smoking or roasting big portions of meat for lengthy periods of time, like turkey. We like thermometers which come with a 6-inch probe and a commercial-quality wire that connects to the read-out gadget.
Know the temperature you want to achieve.
Getting a great thermometer for solid meat is only 1⁄2 the fight. Before you begin grilling, you’ll have to determine what temperature you want to achieve. The USDA recommends that you cook at the following temperatures:
145°F for medium/medium-rare for red meat
145°F for medium/medium-rare for pork
145°F for fish
165°F for chicken/turkey
Please remember that certain meats take 5-10 minutes of sitting before they’re fully cooked, and temps climb somewhat during this period. Bear in mind your own tastes as well—if you want your meat rare, look up the ideal temperature for rare meat.
Correctly Position the Thermometer
Insert the thermometer in the widest part of the steak, away from fat and bone, for the most perfect reading. The minimum internal temperature—the most precise temperature for the meat’s core—is what you’re searching for. Typically thermometers need you to place the needle at least 1/2 inch deep inside the flesh, but if the steak is fatter than one inch, you’ll likely need to go lower.
The temperature measurement from a meat thermometer is obtained from the extreme tip of the probe, so keep an eye on the reading as you press the probe into the meat.
Take multiple measurements.
Observe the recipe’s instructions and check the steak a minute or two before it’s supposed to be done to see if it needs to be cooked longer. Based on how far on the road you were, keep analyzing every few minutes after your original measurement. Remove the thermometer, wash it off, and check again before pulling the meat after the temperature has been reached.
Check the temperature of the meat frequently and early.
Start checking the meat approximately 30 minutes before you anticipate it to be cooked for a bigger roast; for finer, smaller slices, begin testing the meat 5 to 10 minutes before you estimate it to be cooked. The target for the best meat temperatures specified in the recipe, and also food-safety guidelines, to get the desired level of doneness.
It’s crucial to note that when you remove the meat from the heat, it will continue to cook—this is known as carryover cooking. Tiny cuts of meat, such as steaks, chops and chicken pieces, aren’t affected as much, but huge, fat feasts of beef, veal, lamb, pig loin, or even huge turkey chests should be taken away from the fire when they hit 5 degrees below the required target temperature. Allow 5 to 10 minutes for resting time on these bigger slices, and the temperature will increase to optimum doneness and the fluids will have ample opportunity to spread throughout the meat.
After every use, clean the area.
Washing your thermometer will keep it healthy and effective.
If the device is water-resistant, pass the tip beneath hot water for a few seconds before wiping it down with a soapy sponge. If it’s not water-resistant, soak a paper cloth or napkin in hot water, put some dish detergent on it, and wipe off the probe before immediately drying it.
Choosing the thermometer
Not all meat thermometers are made similarly, and meat isn’t the one thing that has to be monitored in the kitchen. Candy thermometers, for instance, are generally flat, square, and have the temperature tip at the bottom. When it comes to heating sugar, it’s fantastic, but when it comes to testing meat, it’s a disaster.